IBM Maximo: Migration from NFS to S3 Storage: Difference between revisions
No edit summary |
No edit summary |
||
| Line 5: | Line 5: | ||
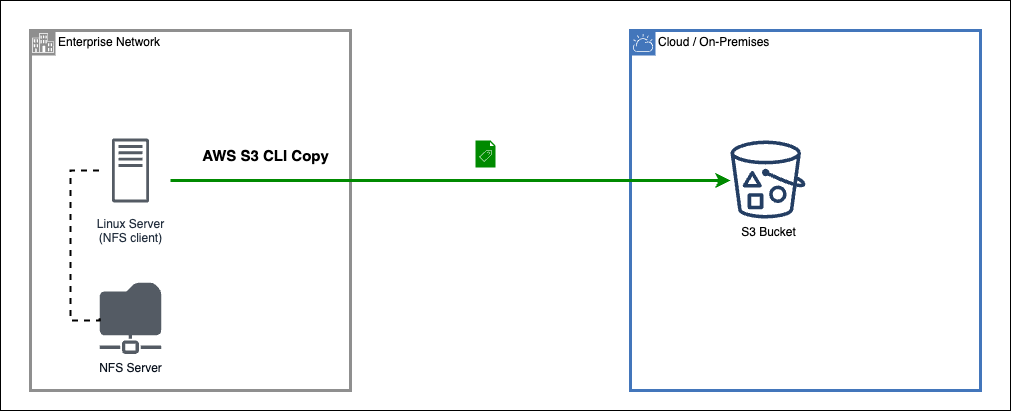
In order to migrate your environment to use S3, it is necessary to: | In order to migrate your environment to use S3, it is necessary to: | ||
# | # Create a bucket in S3 storage in order to store your data. | ||
# | # Setup Maximo application to use S3 | ||
# | # Migrate files from NFS storage to S3 | ||
[[File:Nfs-to-s3-migration.png]] | [[File:Nfs-to-s3-migration.png]] | ||
= Deploying MinIO | |||
= Create a bucket in S3 storage in order to store your data == | |||
= (Optional) Deploying MinIO as S3 storage = | |||
I will use MinIO S3 as my S3 storage | I will use MinIO S3 as my S3 storage | ||
| Line 28: | Line 30: | ||
-e "MINIO_ROOT_PASSWORD=passw0rd" \ | -e "MINIO_ROOT_PASSWORD=passw0rd" \ | ||
== Create a bucket == | |||
1) Create a bucket. Sample: '''maximo-doclinks''' | |||
2) (Access the MinIO console and) create a access token. | |||
The file is something like this: | |||
{ | |||
"url":"<nowiki>http://10.1.1.1:9001/api/v1/service-account-credentials</nowiki>", | |||
"accessKey":"VQ...A", | |||
"secretKey":"K4...e", | |||
"api":"s3v4", | |||
"path":"auto" | |||
} | |||
= Setup Maximo application to use S3 = | = Setup Maximo application to use S3 = | ||
Revision as of 21:43, 25 February 2024
You can configure IBM Maximo and MAS so that it stores attachments in a Simple Storage Service (S3) cloud object storage.
This is the best option when migrate from EAM to MAS.
In order to migrate your environment to use S3, it is necessary to:
- Create a bucket in S3 storage in order to store your data.
- Setup Maximo application to use S3
- Migrate files from NFS storage to S3
Create a bucket in S3 storage in order to store your data =
(Optional) Deploying MinIO as S3 storage
I will use MinIO S3 as my S3 storage
1) The fastest way to have MinIO: MinIO: Deploy MinIO as Container
Important:
- S3 Protocol Port: 9000
- MinIO console Port: 9001
2) Access MinIO console Sample: http://10.1.1.1:9001/login. To login provide the variables from podman command:
-e "MINIO_ROOT_USER=root" \
-e "MINIO_ROOT_PASSWORD=passw0rd" \
Create a bucket
1) Create a bucket. Sample: maximo-doclinks
2) (Access the MinIO console and) create a access token.
The file is something like this:
{
  "url":"http://10.1.1.1:9001/api/v1/service-account-credentials",
  "accessKey":"VQ...A",
  "secretKey":"K4...e",
  "api":"s3v4",
  "path":"auto"
}
Setup Maximo application to use S3
1) setup Maximo application to use S3
- a. Login into Maximo
- b. Go to System Properties Application
- c. Change configurations
| Header text | Header text |
|---|---|
| mxe.cosaccesskey | This value is the access_key_id described in the bucket. |
| mxe.cosendpointuri | This value is the use-geo endpoint address: https://s3.us.cloud-object-storage.appdomain.cloud |
| mxe.cosbucketname | This value is the name defined in the bucket. |
| mxe.cossecretkey | This value is the secret_access_key described in the bucket. |
| mxe.attachmentstorage |
com.ibm.tivoli.maximo.oslc.provider.COSAttachmentStorage Once this value is set, traditional doclinks will no longer work. To revert, this property must be removed and the server restarted. |
| mxe.doclink.doctypes.defpath | cos:doclinks\default |
| mxe.doclink.doctypes.topLevelPaths | cos:doclinks |
| mxe.doclink.path01 | cos:doclinks=hostname/DOCLINKS |
| mxe.doclink.securedAttachment | True |
3) Restart your Maximo Server JVM or Manage UI\ALL pod (if you are using Maximo Application Suite).

